The Commodore VIC-20 is a great machine to learn an assembly language on. It was released in 1981 and was the first computer to sell one million units, which contributes to its popularity today. The machine is well documented, well supported through forums and much of the hardware is plentiful and quite cheap. The 6502 has a smaller instruction set than the Z80 for example and the VIC-20, because of it's limited power, doesn't take long to learn most things about it. This is ideal for busy people who can only afford to spend so much time exploring.
Here I will show you how to get started programming the VIC-20 in assembly language. I will not be teaching 6502 assembly language itself as there are better resources available and I will link to these. I will, however, be showing you what you need to get started, where some of the best resources are and I will be giving a few examples to whet your appetite.
Assembly Language
Assembly language is a mnemonic representation of the computers underlying machine language. It allows you to represent the following machine language in hexadecimal octets:
A9 93 20 D2 FF 00
as assembly language (with comments to explain what is happening)
LDA #$93   ; Load the Accumulator register (A storage location in the CPU)
           ; with the value $93, which is the Clear Screen code
JSR $FFD2  ; Jump to a subroutine at location $FFD2 (Print a character routine).
BRK        ; Break out of the program.
One you get used to 6502 assembly language you will be able to read it much easier than machine language. That said, you will naturally become familiar with the machine language as well when you are debugging and inspecting memory. So you will easily spot BRK ($00) or JSR ($20) instructions. This familiarity gives you a much closer connection to the machine and ultimately allows you to fine tune your programs to get the most out it.
It is useful to know that a $ indicates a hexadecimal number, a % a binary number, and if neither then a decimal number. If a number is prefixed with a # this says that it is a literal number as opposed to being a reference to an address in memory.
VICMON: A Machine Language Monitor
A machine language monitor is a good way to start learning assembly language. VICMON was released by Commodore in 1982 and hence is quite common. A ML monitor allows you to inspect and alter memory as well as run code from memory. In addition many, including VICMON, allow you to assemble (turn mnemonic representations of machine code into actual machine code) and disassemble (turn machine code into a mnemonic representation). The interactive nature makes it an ideal learning tool as you can try things out and straightaway see what happens. Later on a ML monitor can help you to debug your programs and understand other people's better.
VICMON can be downloaded from the zimmers.net 4k tool ROMS archive and the manual is available online. For an in-depth look at how to write machine language programs with VICMON see: Programming in Assembly with VICMON on the VIC-20.
Using VICMON
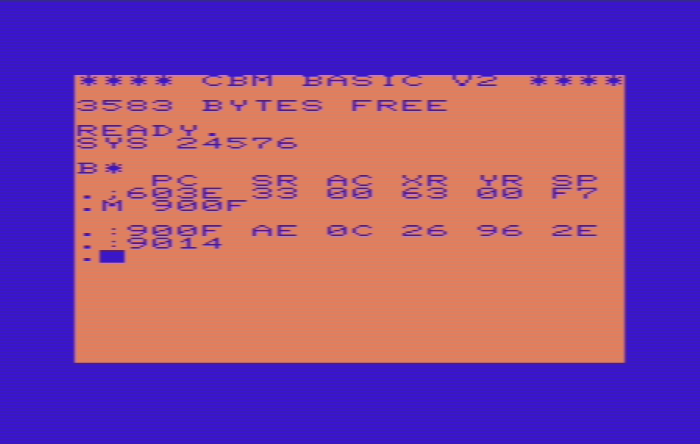
Attach your VICMON cartridge while your VIC-20 is off and then turn it on. Or if using an emulator, attach the cartridge image at $6000.
To enter the monitor from BASIC:
SYS 24576
This brings up a status showing the registers and Program Counter (PC), followed by the . prompt.
VICMON Commands
Below is a list of commands used in this article. To see more commands and a more in-depth explanation of them look at the manual linked above. Other monitors use similar commands, but you will have to check their manual for the specifics.
| Command | Parameters | Explanation |
|---|---|---|
| A | address opcode operand | Input assembly code and have it stored as machine code. |
| D | startAddress [EndAddress] | Convert machine code at startAddress or between the two addresses to assembly language. |
| G | [address] | Execute a program at the current PC (Program Counter) or address if specified. |
| L | "filename" device | Load a program file from device into memory at the location it was originally saved from. |
| M | startAddress [EndAddress] | Display memory at startAddress or between the two addresses and allow you to alter it. |
| S | "filename" device startAddress endAddress | Save memory between the two addresses to device. |
Peeking and Poking Around in Memory
The M command allows you to peek (look) into memory and to poke (alter) memory.
If you look at these screen & border colour combinations, you'll see how you can change the screen and border colour by altering location 36879. We'll change the display to a Pink screen and Blue border which is 174 in the chart. So remembering that VICMON works in hex, we convert 36879 to 900F and 174 to AE. We can now change the screen and border colour using the M command from the . prompt:
.M 900F
Now alter the first octet to AE and press <Return>. You'll see the screen and border change colour.
Within VICMON you can use the cursor keys to navigate back over the number, change it and press <Return> to see the colours change again.
If you look at the memory map you'll see plenty of other interesting places to inspect and alter.
Assembling / Disassembling
To turn assembly language into machine code you use an assembler; to turn it back again your use a disassembler. VICMON includes both, which makes entering code much easier and also allows you to look at other people's code or the Basic KERNAL to work out how something has been done.
Clear Screen Program
To enter the piece of code above to clear the screen we use the A command from the . prompt (<Return> indicates pressing the return key):
.A 1400 LDA #$93
        JSR $FFD2
        BRK
        <Return>
The 1400 above tells the assembler the hex location where we want to start entering the code. $1400 was chosen as it is an area of free memory as can be seen in the memory map referenced previously.
The program Loads into the Accumulator the value $93. The Accumulator is an area of fast memory located within the 6502 CPU. $93 (decimal 147) is a literal value representing the CLR (Clear Screen) character as seen in the list of ASCII and CHR$ codes. Then it Jumps to a subroutine in memory at address $FFD2. A subroutine is a piece of code in memory that does something and knows how to return to where it was called. In this case $FFD2 is the CHROUT (Output character to channel) subroutine which can be found in the list of user callable KERNAL routines. CHROUT expects the character to be output to be in the Accumulator, hence the reason that it was put there previously. Once the subroutine has finished it returns to the instruction after the one that called it. Here this is the BRK instruction, which says that processing has finished and control will be returned to the ML monitor.
To run it:
. G 1400
To look again at our code by disassembling it:
.D 1400, 1405
Which shows:
., 1400 LDA #$93
., 1402 JSR $FFD2
., 1405 BRK
Hello, World!
In introductory programming tutorials it is customary to do a "Hello, World!" program. We'll do this by extending the program above past the clear screen routine:
.A 1405 LDX #$00
        LDA $1413, X
        BEQ $1412
        JSR $FFD2
        INX
        BNE $1407
        BRK
        <Return>
This code starts by Loading the X index register with the value $00 and then Loading the Accumulator with the value at memory location $1413 + X. This location is where the "Hello, World!" string is held. So it allows each character of the string to be put into the Accumulator. Once the character is loaded, it is checked to see if it Equals zero; if it is then the code Branches to $1412, which is the location of the BRK instruction as can be seen in the disassembly below. Therefore 0 is used to mark the end of the string. With the character in the Accumulator, the program can now Jump to the Subroutine at $FFD2 (CHROUT) to output this character. The X index register is now incremented by one and the code Branches back to the instruction that loads the next character from the string.
If you look at the following two lines from the code above you will see that they refer to the addresses $1412 and $1413 whose location wasn't known at the time of entering them.
LDA $1413, X
BEQ $1412
To get around this, when the program was first written I put in dummy values and made a note of which places I needed to go back to, to correct the forward references. Once the program was entered I could disassemble it and find the locations of the BRK instruction and the one past it for the string. Armed with this I went back and using the A command altered those lines to point to the correct locations.
It maybe instructive to know why a BNE (Branch if Not Equal) instruction was chosen instead of a JMP instruction. If we look at the table below we can see that the BNE instruction takes less bytes in memory (2 instead of 3). The reason for this is that the BNE instruction uses relative addressing, so instead of specifying an absolute address to Branch to, the assembler converts BNE $1407 to the opcode for BNE ($D0) followed by a single byte representing the number of bytes forwards or backwards to get to $1407. This allows a maximum distance of 128 bytes backwards and 127 bytes forward because a single byte can have 256 possible values. Whereas the JMP instruction gets assembled to the opcode for JMP ($4C) followed by the two bytes of $1407.
| Instruction | Addressing Mode | Number of Bytes |
|---|---|---|
| BNE | Relative | 2 |
| JMP | Absolute | 3 |
The BNE instruction also has the added bonus that it protects the program from running for ever in case the 0 is forgotten at the end of the string. Once X gets to 255 if it is incremented it will become 0 and the BNE instruction will pass control to the BRK instruction to end the program.
More information is available in this 6502 instruction reference.
If we were to disassemble the full program with:
.D 1400, 1412
We would get:
., 1400 LDA #$93
., 1402 JSR $FFD2
., 1405 LDX #$00
., 1407 LDA $1413, X
., 140A BEQ $1412
., 140C JSR $FFD2
., 140F INX
., 1410 BNE $1407
., 1412 BRK
Press <Return> to get back to the . prompt.
The program will print a string, located at $1413 just past the BRK instruction. This is a "Hello, World!" program, so to find the correct bytes to represent that string we'll look at this list of ASCII and CHR$ Codes, to come up with the following decimal numbers representing the string:
72 69 76 76 79 44 32 87 79 82 76 68 33 13 00
H  E  L  L  O  ,     W  O  R  L  D  !
13 is Carriage return, 32 is space and 00 marks the end of the string.
This is then translated into hex to produce:
48 45 4C 4C 4F
2C 20 57 4F 52
4C 44 21 0D 00
Enter these bytes starting from $1413 with the M command:
.M 1413
You will see the address $1413 followed by five octets. Use your cursors to move over to the first octet and alter each in turn to match the list of hexadecimal numbers above. After five have been entered press <Return> to enter the next five. Repeat until all the octets have been entered and then press <Return> again to stop entering and return to the . prompt. Note that the last memory location mentioned by the M command is $1422; we will need this value later.
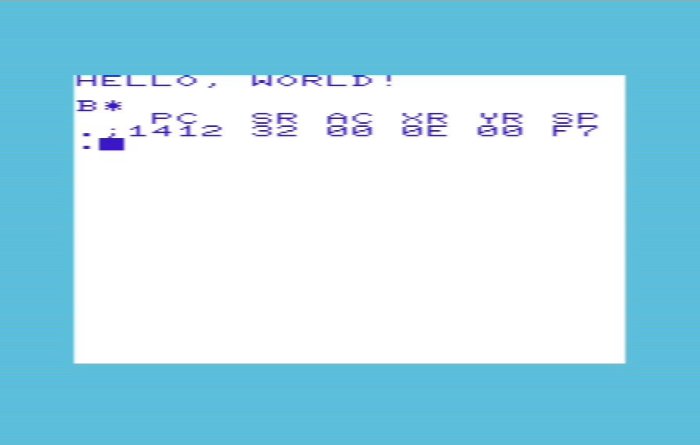
If we run the program:
.G 1400
You will see the screen below greeting the world.
You may have noticed that there is no real need for the first two instructions to call $FFD2 as it would have been easier to prepend the string with $93 to clear the screen. However, I wanted to show how to use the A command to change the instruction at a location and carry on entering assembly.
Loading/Saving
If we wanted to Save our program above we would use the S command. To save it to disk use:
.S "HELLO",08,1400,1422
For cassette replace the 08 with 01.
Note that, unlike the other VICMON commands, we must use commas to separate the arguments. Using the memory location $1422 noted above, this saves the region of memory from $1400 to $1421 inclusive. The end memory address must be given as one past the real end address.
If you turn your machine off, or do a hard reset from an emulator and go back into VICMON. You can now load the program back off cassette or disk:
.L "HELLO",08
Again replace the 08 with 01 for cassette.
If we wanted to access our saved program from basic without a VICMON cartridge, then you would just change the BRK instruction to an RTS instruction before saving. To load the program from BASIC:
LOAD "HELLO",8,1
To run the program from BASIC we use the SYS command. In the following 5120 is the decimal equivalent for $1400:
SYS 5120
Where now?
There is plenty of information on this site with further links to other sites about programming the Vic. To start have a look at:
- Useful VIC-20 Resources
- Links to resources available online about the Vic
- VIC-20 Articles
- Our articles about the Vic including many about programming
- VIC-20 Playlist
- Videos on the TechTinkering YouTube Channel supported by articles on this site
